Pages

9/11/12

cross-hatched nails

After seeing a few different versions of multiple stamped nails, and decided to try it out. My favorite part is that it doesn't need to be very neat, making it easier and quicker to do.

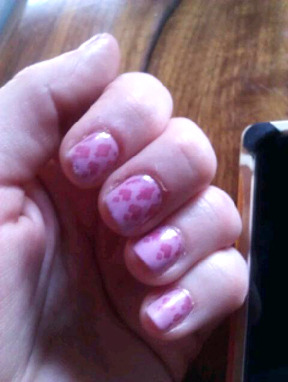
I did three layers of color, dark grey, teal, pink. I found that it looked best when I alternate the direction of the pattern from layer to layer.


Here's what the first layer looked like. Easy, peasy!
Simple tutorial: do above. repeat 2 more times with different colors. top coat.


Other versions for inspiration
http://pinterest.com/pin/258182991108985109/
http://pinterest.com/pin/258182991107810563/

6/3/12

argyle

My roomate's lovely nails, decorated with Sally Hansen Polish Strips. 
Love them mixed with matching nail polish.

3/14/12

my addiction (houndstooth nail stamp)


I admit, I have a little addiction to houndstooth. I love houndstooth nails, have a houndstooth purse, and have houndstooth printed paper on my bedroom wall. My solution? More houndstooth nails!!

These are stamped designs. White base, dark grey stamp.

3/9/12

all american

While it was definitely not the aim, this turned out to be a very patriotic manicure. I purchase a white polish with a thin brush, and wanted to test it out, hence the white line.

3/7/12

I love chevrons ...


... just can't get enough of them!


{nail photos curtesy of Colleen & Brad, thanks!}


3/5/12

sweet nails

Today I'm sharing some nail stamp photos from a friend. A few weeks ago she 
visited and used my nail stamps, loved them so much, she went right home and 
purchased her own. I love seeing all the cool designs she's been trying!


2/27/12

subtle


This is a nail design a friend of mine stamped on her nails. Love the low contrast of the design, and how subtle it is.

2/21/12

Teal + Silver Glitter Half Moons


My favorite way to do half moons, glitter peaking out from a light color.

Loved that a friend showed up yesterday, with the same aqua/teal color on her nails!

2/10/12

cherry blossoms


Was walking home today and noticed the blossoming cherry blossom trees, which matched my nails. Looks like spring is already here in SF!

2/6/12

warm cup of coffee (chevron nail stamp take two)

Took a photo of my current grey & blue chevron stamped nails while at Golden Gate Park cheering on my roommate who was running her first 5K (go Christi!).  While she was running, another friend and I grabbed coffee, and enjoyed a nice stroll through the park.

(I've discovered I have wide nails, these designs don't cover the width of some nails:) )

1/30/12

Aqua

Yep, my nails match my bathtub. Just a coincident, but when I put the Matte About You over the aqua polish, it was a pretty close match to the color of the tub. 

1/28/12

review: Matte About You {by Essie}

Love this big time!! I heard about this top coat on another blog, and have been trying to track it down for awhile. Matte About You, by Essie, is a matte top coat. So basically, I can do whatever design I want on my nails, put this over it, and it's matte! I love that it's different than the typical nail look. A little edgy, but still classy.

Previous matte polishes I have used start to dull (I guess in this case, get shinier) after a day or two, as it picks up oils from your hands, hair, lotion, but I find that this one holds up very well. Just be careful to let it fully dry before doing anything that might mess up your nails. It will look dry in a minute or two, but I wound up with some nicks since I assumed it as fully dry. 

1/26/12

Dots

I picked up a marbling & dotting tool from Sephora the other day, and tried it out on a simple dotted manicure. Looking forward to trying out some other fun things with it, maybe hearts for Valentine's Day?

1/25/12

bamboo shoots

Another stamp manicure I did for my roommate. She wanted it to look like bamboo for Chinese New Year, but the yellow polish didn't work well with the stamp. We used white instead, and I like the delicate look it gives it.

Stamp polish: white

1/21/12

meet the flintstones

While this wasn't quite the look I was going for, I think I like it, it reminds me of Dino. Agree?
I like this nail stamp image since it's easy to use and very forgiving. FTW!

Another post using the same stamp.

Image plate: BM 211
Base polish: SinfulColors Mint Apple
Stamp polish: Wild Shine Eggplant

1/19/12

aztec? sweater?

Another friend let me try the nail stamps on them. I liked this stamp, which had an Aztec, sweater-ish pattern, which worked better on some nails than better. Of course, a lot of that is my error:)

1/18/12

Chevron {Nail Stamp}

My wonderful sister gifted me a nail stamper and set of image plates for christmas/birthday (they are close together) and I was so excited when they arrived in the mail last week, and I finally got the chance to try them out this weekend. While to took a bit of trial and error, the end result was totally worth it, and the process was a lot of fun. Looking forward to having some friends over to be my guinea pigs, so I can try out more stamp designs.
Polish from Julep: Heather, and Blake

Check out these tourials to see how to stamp:

1/16/12

Purple Plaid

My roommate let me paint/stamp her nails. I really like how they turned out, and it was fun trying out some other stamps. Good times:)

1/8/12

Ombre Nails

I don’t think this photo does a good job of showing how well this turned out. This was my third or fourth attempt and I think I have found a technique I really like, so I’ll share with you how I did it.

What you need:
  • base color (not too opaque)
  • darker tip color
  • makeup sponge
  1. Paint the entire nail with the base color (once or twice).
  2. Place a few drops of the darker color on a piece of cardboard.
  3. Take the makeup sponge (I cut them up into smaller pieces, so I get more use out of one sponge), dip it into the polish and dab onto nail, starting on tip.
  4. Work toward half way up the nail, applying less polish as you move towards the nail bed (depending on the look you want, I’d suggest using the darker color on only 1/2 or 2/3 of the nail)
  5. Continue to add layers of polish at the tip, so the color there is opaque.
  6. I then put on layer of the lighter polish over the top, to help create a smooth gradient. It’s not necessary to go to the very tip.
(I usually use an additional base coat at the beginning and a quick-dry top coat)

Some good tutorial photos can be found on Going West.
I’d love to hear if anyone tries this, and how it works for them.

1/5/12

Dots & lines

My first try at drawing on my nails with a nail art pen (Sally Hansen). I think it turned out pretty great (with the help of my roommate to draw the lines on my right hand). And if you can’t see in the photos the black is a matte polish, so it sort of had a chalkboard feel.

{update: since it was a matte polish, I didn’t put on a top coat, and after a little while the white started rubbing off. A little while meaning within an hour:( Lesson learned, don't skip the top coat}